What happens when I have two batches of LED panels that I need color matched?
Great question! First of all - it will be quite hard to have two batches of panels match perfectly. However, you can get close! Follow the instructions below to perform a Multi-Batch Adjustment.
Before starting, ensure the receiving cards in both batches of panels are using the same firmware! Click here for help with firmware upgrades › NovaStar Firmware Upgrades
For this article, Batch 1 is the older panels, Batch 2 is the newer panels. It is recommended to follow this setup.
- Confirm your display settings.
- Ensure your display is "Duplicated" not "Extended" by pressing Windows + P on the keyboard.
- Verify the display scaling is set to 100%. Right-click on an empty part of the desktop and select "Display Settings". Find the "Scale and Layout" section and verify the dropdown is set to 100%. If not set correctly, this can cause issues during the following steps
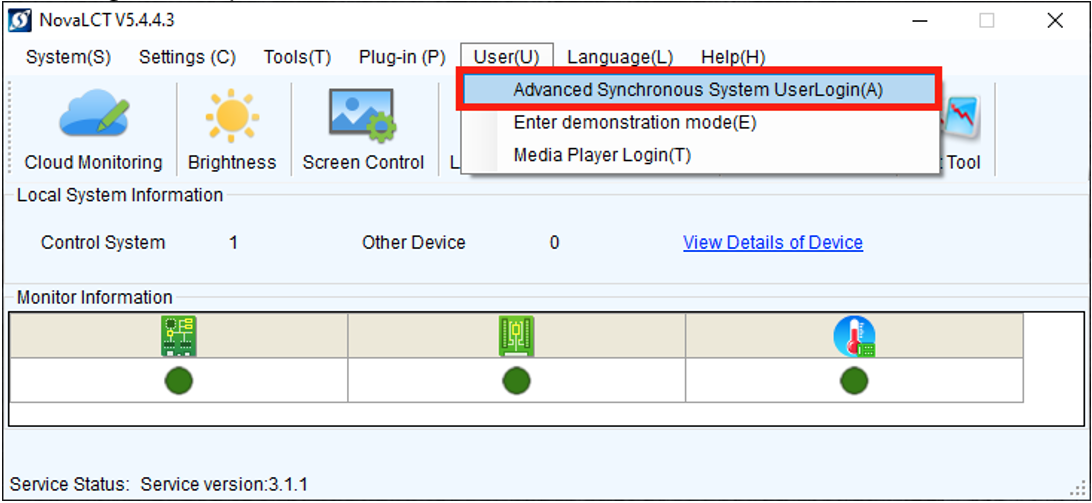
- Launch NovaLCT and navigate to Users › Advanced Synchronous System UserLogin. Use the password "admin"
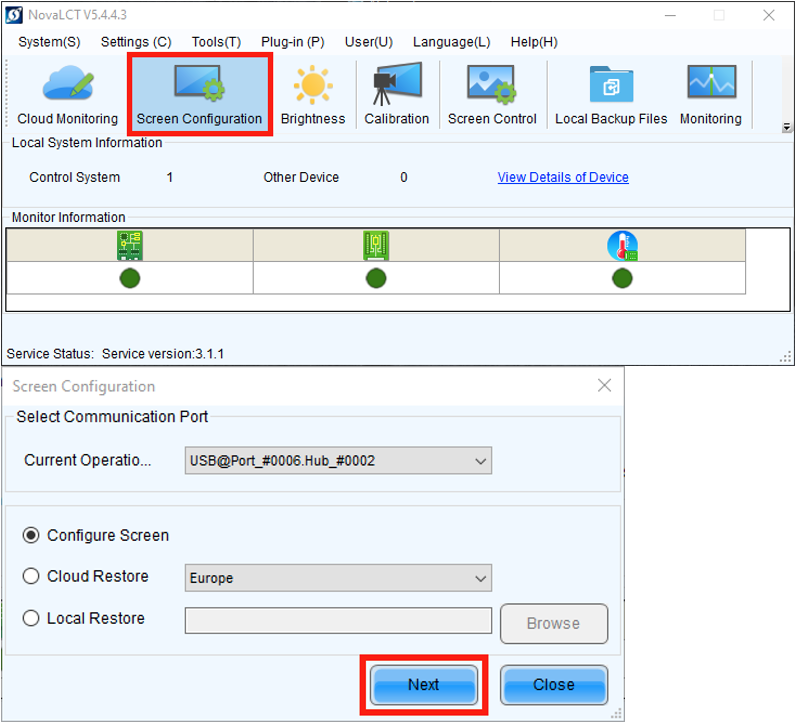
- Click "Screen Configuration" from the main window, then click "Next"
- Load the RCFGX configuration file for the newer of the two batches. This establishes a common baseline configuration. Send to all receiving cards.
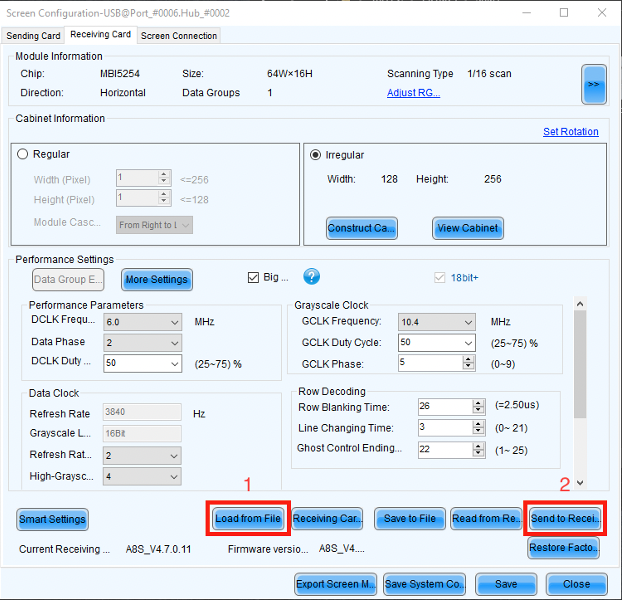
- Click "Save" to save this configuration to the processor.
- Return to the main screen of NovaLCT (Close the Screen Configuration window)
Navigate to "Tools" › "Multi-batch Adjustment"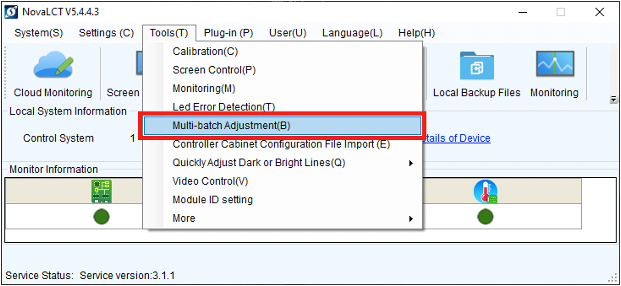
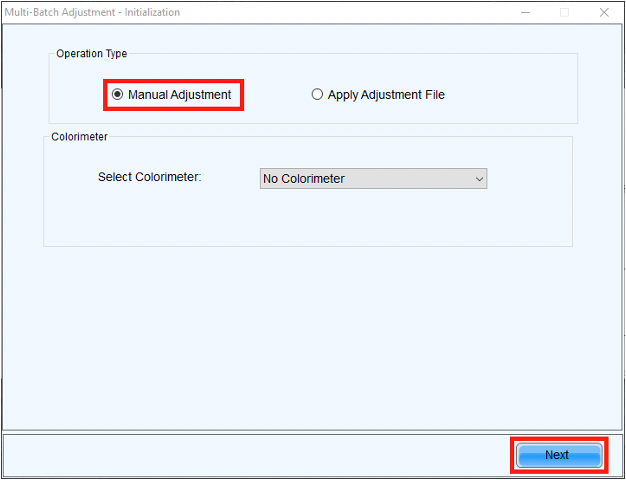
- Select "Manual Adjustment", then click "Next"
- Add a panel from Batch 1 to "Sample Batches 1" by clicking the green "+" icon on the right.
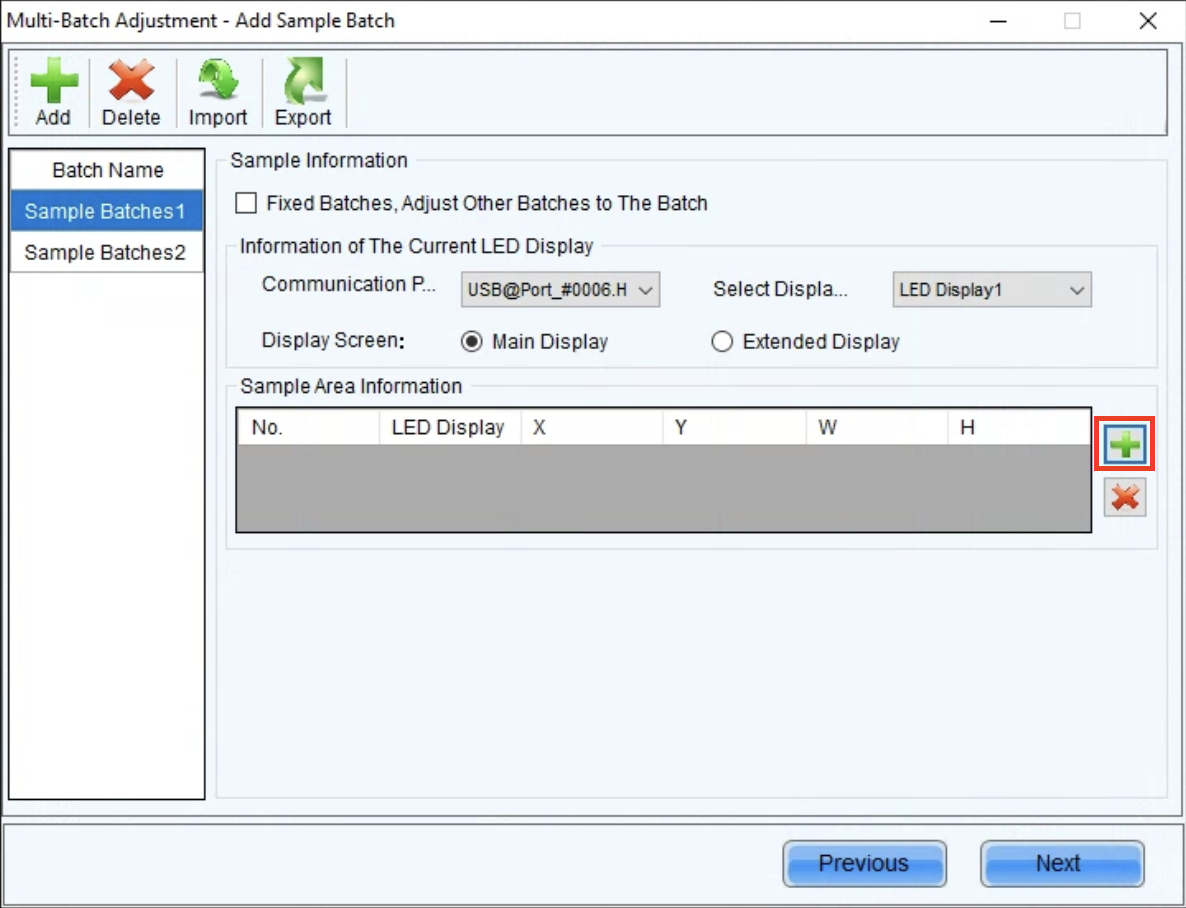
- Select the desired panels from Batch 1 and click "Add"
In the screenshot below, the left 4 panels are batch 1, and the right 4 batch 2.
Adjustments will go faster with fewer panels selected.
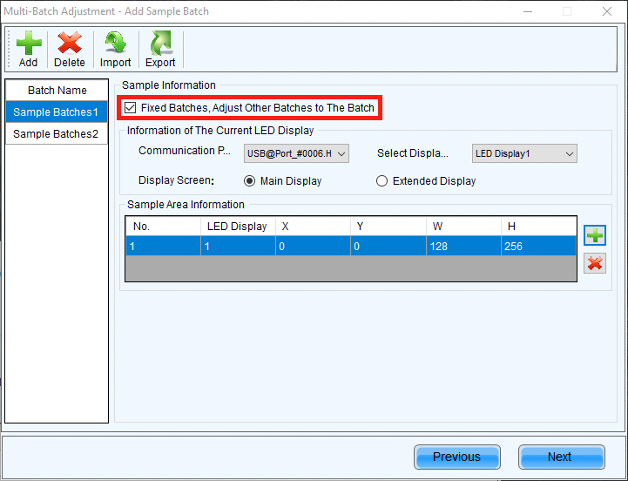
- Once the panel(s) has/have been added, enable the "Fixed Batches, Adjust Other Batches to the Batch" checkbox. This will ensure only changes are made on the new batch (batch 2).
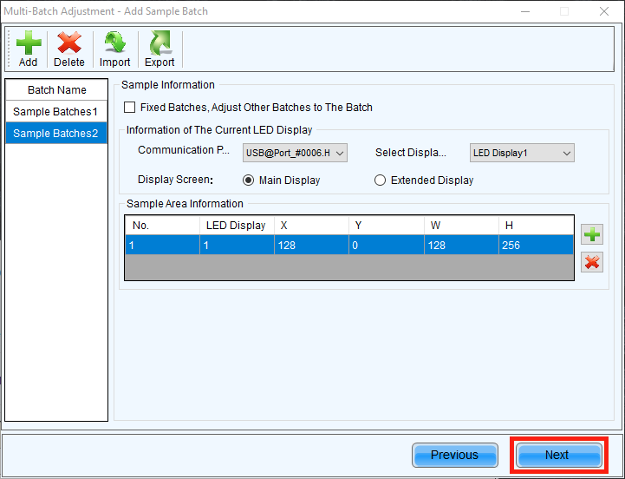
- Repeat steps 8 and 9 for "Sample Batches 2", then click "Next"
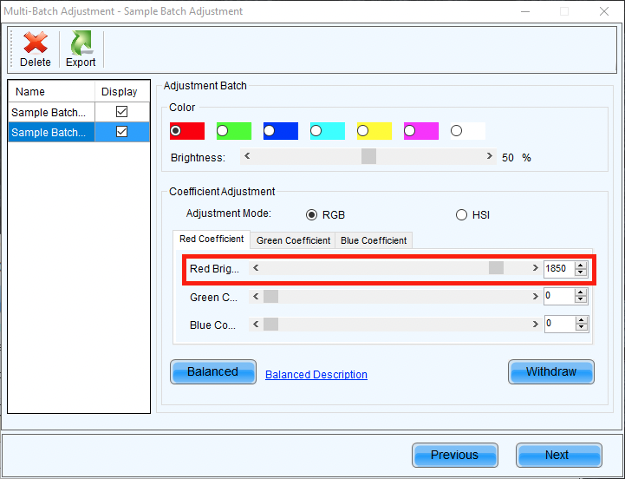
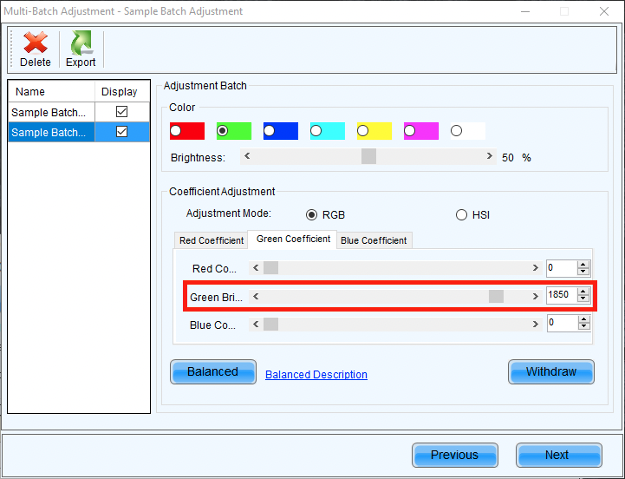
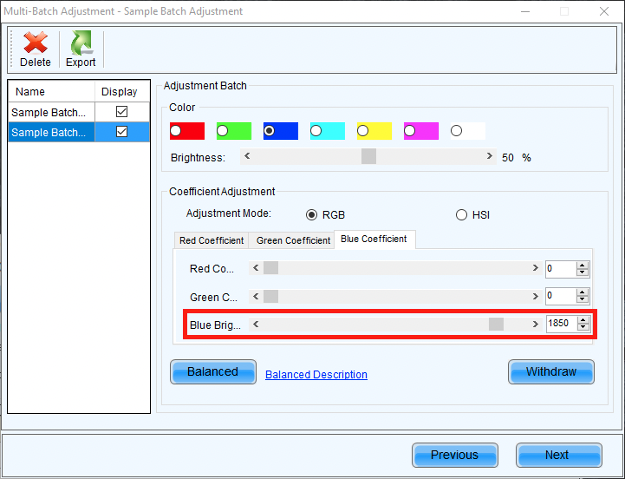
- Adjust the Red, Green, and Blue values for "Sample Batches 2" as needed to match "Sample Batches 1" Use the brightness slider to check the difference at different levels. Click "Next" when satisfied with the result.
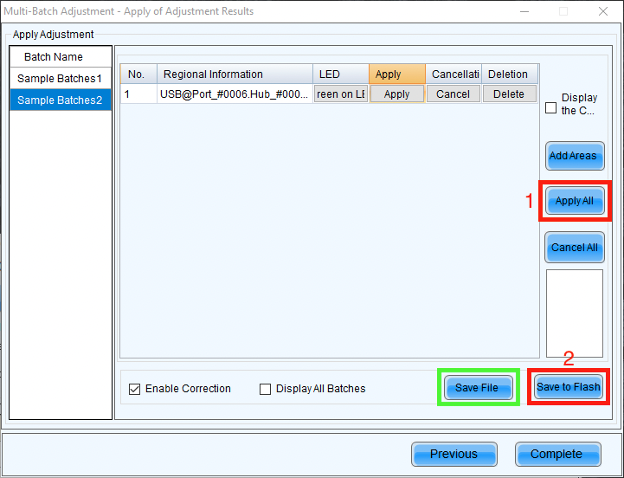
- Select "Sample Batches 2" from the left, then click "Add Areas"
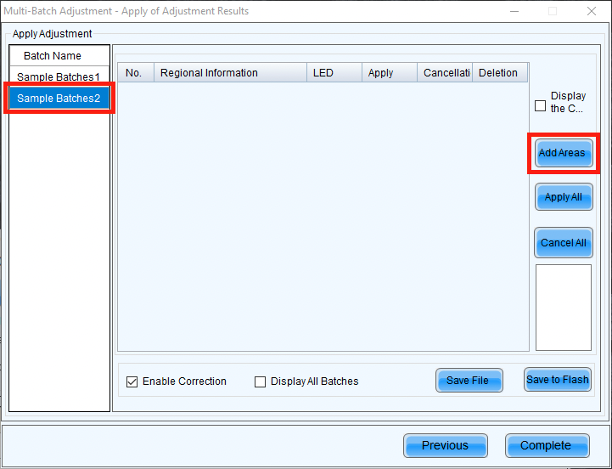
- Select the cabinets added in step 9 for Batch 2, as well as any additional "new" panels connected.

- Once all of the desired panels have been added to the list, click "Apply All" to send the adjustment data. Next, click "Safe to Flash" to save this adjustment to the receiving cards. Additionally, click "Save File" to export this adjustment for future use.
Still having trouble? Reach out to the IRiS Video Team: videosales@blizzardpro.com